Introducing...
Tutorial #001
The Old Navy Swirly Tee
Well, since we have no vacation to go on across the U.S. in our RV, I thought I’d finally get to my first tutorial. It’s the Old Navy Swirly Tee (well, that’s what I call it anyway). If you’re not sure what shirt I’m talking about, this is the tee...
If you’ve already purchased one for yourself, you know that they can be a little bit spendy for a t-shirt. In fact, the one I bought for myself was $14.50. My daughter really wanted one too, but I wasn’t willing to pay that price for a t-shirt since she doesn’t always take care of her clothes. So, I decided to make hers instead.
I began with a trip to Goodwill. Don’t you just love the GW? If I had more time, we would have gotten our goodies at various garage (or “garbage” as hubby says) sales; but, I wanted to get these done quickly so my daughter could take them with her on her mini vacation to Canada with her grandmother. Each shirt was purchased for 50% off of original prices of $ .99 to $ 3.99. So they cost only $ .50 to $ 1.99. The fat quarters that I used to make the swirls are currently on sale at JoAnn's and they cost only $.99. Needless to say, her swirly tees cost anywhere from approximately $ 1.50 to $ 3.00. What a value!

Step 1: Decide the number of and sizes of circles that you want on your tee. You’ll end up cutting your “swirls” from these circles. When you have decided on your circles ~~ I’ve always found the number 3 to be a good number for “bundling”, and they don’t necessarily have to be clumped together) ~~ it is time for the next step.
Step 2: Cut out various circles using a craft knife. I was able to cut around my Creative Memories circle cutter templates with my craft knife. I found this was the easiest way to make my circles. You can also cut around a glass, a cup, a vase, or something similar with your craft knife ~~ depending on the sizes you want for your circles. But, if you only have a circle template sheet, it would be best to trace/draw on wrong side of fabric and cut with scissors.
Step 3: Turn circles into “swirls”. Take your scissors and cut from the outside of circle to the center of the circle in a continuous round, or circular, direction so that when you are finished it looks as though you have a coiled up snake ~~ remember cutting this out of paper when you were a but a wee one?
Step 4: When your coil is finished, you will end up with an extra lump of fabric along the side of your coil where you began your cut into your circle. Trim this lump off the side of your coil so that the width is consistent along the full length of the coil.
Step 5: Do this as many times as you want for the number of swirls on your tee and out of as many different (or the same) fabric choices as you wish.
Step 6: Decide on placement of swirls on tee. Your swirls can be grouped together or can be placed singularly anywhere on your tee. You can even have a grouping of swirls and then a lone swirl at the bottom of your tee. It is entirely up to you and your design aesthetics.
Step 7: Pin down only the center of the first swirl and begin sewing.
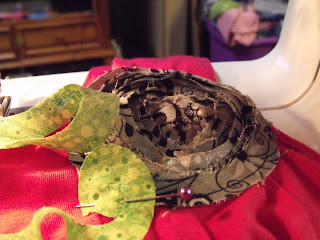
Step 8: Now, this step will take a little patience and finesse. Slowly anchor center of swirly coil to tee. Then, wind the coil around the center of the swirl slowly. At times you may need to lift the presser foot of your machine (while needle is still in the fabric) and realign with the coil. While doing this you will need to (ever so slightly) cover the previous outside edge of the swirl with the new inside edge of the swirl. You want to end up with a tight swirl.
Step 9: Repeat this step with each additional swirl you wish to have on your tee.
Step 10: WEAR IT! Your beautiful new swirly tee is complete and should look a little like this...
Doesn’t she look amazing? I think she has a future in modeling (what do you think?). Well, Kendahl absolutely loves her new shirt and hasn’t taken it off (except for bed) in the last two days. Now I have to run and finish her three other tees so that she will have them on her trip with her grandma. I hope you liked this tutorial and that you found it helpful. If you decide to make one for yourself, I would love to see it ~~ just send me a comment and link back to me so that I can check it out.
Thanks again and happy crafting (or sewing in this case),
Missy


Cute project!
ReplyDeleteVery cute!
ReplyDeleteI'm a new follower from New Friend Friday.
I hope you'll come check me out at PS Mom Reviews and follow me too!
Really creative! I'm a new follower from Follow Me Friday! Come visit some time!
ReplyDeleteDawn
http://www.thewayiseethings.typepad.com
So cute! I love the fun colors. Thanks for sharing on Saturday is Crafty Day!
ReplyDeleteLaura @ along for the ride
they look so cute on the t-shirt, and so easy to make. Thanks for the detailed instructions, I'll have to try this too.
ReplyDeleteSo cute! What a fun idea. I love the colors.
ReplyDelete-Crystal