CLICK HERE FOR FREE BLOG LAYOUTS, LINK BUTTONS AND MORE! »

Tuesday, June 29, 2010

Need Some Help With Dinner?

          Need Some Help With Dinner?  With today’s busy, hectic and over booked work days, dinner becomes the nightly casualty – in both quantity and quality of the nightly meal.  After a long hard day of work and/or play, one of the last things you want to do when you get home is spend another hour or more preparing the family’s dinner...from scratch.  Then, if you’re lucky, you might sit down for dinner around 8 or 9 o’clock at night.  Well, I know I’ve found the perfect solution for this all consuming chore...

          It is ... DREAM DINNERS


          Let me fill you in...

          Right around the beginning of June I was having a difficult time getting to sleep and then staying asleep once I finally got to sleep.  The cure for this was nightly channel surfing, where I watched an infomercial that interested me very much.  This infomercial was for Dream Dinners (“DD”) and I was immediately hooked.  I was thinking how much my family would love me (like, unconditionally...) if we were to actually have nightly sit-down meals.  So the next morning I was on the computer signing up for my $75 trial session.

          As their literature states, Dream Dinners is where quick and healthy meals become a reality.  They are not one of those expensive, frozen, pre-packaged mail-order food delivery services.  In fact, the great thing with DD is that you, yourself, will prepare your dinner choices.  In fact, their monthly menu includes more than 14 different recipes each month, as well as some additional pre-assembled dinners, sides, breads and desserts that can be purchased during your session to accompany your dinners.  These are the meals that I chose to prepare for my family from the June Menu.  Each meal we prepared has only three portions (there are only three of us left at home) but you can purchase these meals in a larger six portion meal:

          1.     Crispy Parsley Shrimp over Polenta

          2.     Pesto Primavera Stuffed French Bread

          3.     Savory Grilled Pork Chops with Sweet Potato Fries

          4.     Sweet Chipotle Chicken over Egg Noodles

          5.     Mango Glazed Salmon

          6.     Sonoma Grill Steaks

          7.      Two Build Your Own Calzones

          After doing some basic math calculations, my husband and I figured out that the $75 we paid for these meals, turns out to actually be about the same amount of money we would normally spend on a week’s worth of groceries.  And, believe me, the groceries that we would purchase wouldn’t even be in the same league.  The would mostly consist of pre-packaged convenience foods.

TO BE CONTINUED...

          Please tune in for part 2 of my Dream Dinners experience ... You will not be disappointed.

Missy

          P.S.:     I am not being compensated for my opinions about Dream Dinners.  I just want to share my excitement about these meals with all my friends...

Friday, June 18, 2010

My First Tutorial...An Old Navy Swirl Tee


Introducing...

Tutorial #001
The Old Navy Swirly Tee

     Well, since we have no vacation to go on across the U.S. in our RV, I thought I’d finally get to my first tutorial.  It’s the Old Navy Swirly Tee (well, that’s what I call it anyway).  If you’re not sure what shirt I’m talking about, this is the tee...


     If you’ve already purchased one for yourself, you know that they can be a little bit spendy for a t-shirt.  In fact, the one I bought for myself was $14.50.  My daughter really wanted one too, but I wasn’t willing to pay that price for a t-shirt since she doesn’t always take care of her clothes.  So, I decided to make hers instead.

     I began with a trip to Goodwill.  Don’t you just love the GW?  If I had more time, we would have gotten our goodies at various garage (or “garbage” as hubby says) sales; but, I wanted to get these done quickly so my daughter could take them with her on her mini vacation to Canada with her grandmother.  Each shirt was purchased for 50% off of original prices of $ .99 to $ 3.99.  So they cost only $ .50 to $ 1.99.  The fat quarters that I used to make the swirls are currently on sale at JoAnn's and they cost only $.99.    Needless to say, her swirly tees cost anywhere from approximately $ 1.50 to $ 3.00.  What a value!


     Step 1:    Decide the number of and sizes of circles that you want on your tee.  You’ll end up cutting your “swirls” from these circles.  When you have decided on your circles ~~ I’ve always found the number 3 to be a good number for “bundling”, and they don’t necessarily have to be clumped together) ~~ it is time for the next step.


     Step 2:    Cut out various circles using a craft knife.  I was able to cut around my Creative Memories circle cutter templates with my craft knife.  I found this was the easiest way to make my circles.  You can also cut around a glass, a cup, a vase, or something similar with your craft knife ~~ depending on the sizes you want for your circles.  But, if you only have a circle template sheet, it would be best to trace/draw on wrong side of fabric and cut with scissors.


     Step 3:    Turn circles into “swirls”.  Take your scissors and cut from the outside of circle to the center of the circle in a continuous round, or circular, direction so that when you are finished it looks as though you have a coiled up snake ~~ remember cutting this out of paper when you were a but a wee one?


     Step 4:    When your coil is finished, you will end up with an extra lump of fabric along the side of your coil where you began your cut into your circle.  Trim this lump off the side of your coil so that the width is consistent along the full length of the coil.


     Step 5:    Do this as many times as you want for the number of swirls on your tee and out of as many different (or the same) fabric choices as you wish.


     Step 6:    Decide on placement of swirls on tee.  Your swirls can be grouped together or can be placed singularly anywhere on your tee.  You can even have a grouping of swirls and then a lone swirl at the bottom of your tee.  It is entirely up to you and your design aesthetics.


     Step 7:    Pin down only the center of the first swirl and begin sewing.


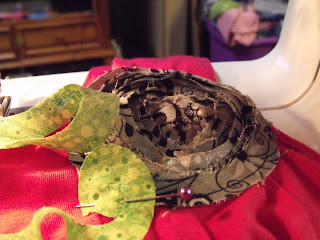
     Step 8:    Now, this step will take a little patience and finesse.  Slowly anchor center of swirly coil to tee.  Then, wind the coil around the center of the swirl slowly.  At times you may need to lift the presser foot of your machine (while needle is still in the fabric) and realign with the coil.  While doing this you will need to (ever so slightly) cover the previous outside edge of the swirl with the new inside edge of the swirl.  You want to end up with a tight swirl.


     Step 9:    Repeat this step with each additional swirl you wish to have on your tee.


     Step 10:    WEAR IT!  Your beautiful new swirly tee is complete and should look a little like this...


     Doesn’t she look amazing?  I think she has a future in modeling (what do you think?).  Well, Kendahl absolutely loves her new shirt and hasn’t taken it off (except for bed) in the last two days.  Now I have to run and finish her three other tees so that she will have them on her trip with her grandma.  I hope you liked this tutorial and that you found it helpful.  If you decide to make one for yourself, I would love to see it ~~ just send me a comment and link back to me so that I can check it out.

     Thanks again and happy crafting (or sewing in this case),

Missy

Tuesday, June 8, 2010

Terribly Unlucky...

Well, I haven't been blogging (or even reading any of my favorite blogs) because we have been frantically getting ready for our RV trip across the US to Kentucky for our son's graduation....  I mean, we have been packing and working on the RV and packing and fixing all those little things that always show up at the last minute.  I have to tell you that my husband is the world's handiest man.  I mean he can do anything.  He is absolutely amazing and he is one heck of a perfectionist when doing man things.  Well, he made (believe it or not) a boo boo, and it turned out to be a costly boo boo.  He ended up ruining the motor in the RV by getting just a tinsy bit ahead of himself (which is not like him); but, in his defense, he has been working night and day to make sure that our motorhome doesn't break down on the trip across country.  Well, we don't have to worry about that now.  Because we are replacing the motor (can you say not budgeted for $2,500 extra cost) at this very moment.  And, we won't be making our son's graduation now either because this puts us a week behind schedule.  I'm waiting for the other shoe to drop...aren't you.

Terribly unlucky tripster,

Missy